- Joined
- Apr 6, 2013
- Messages
- 3,352
- Location
- Los Angeles
First off, I'd like to thank EvoL for his patience and resourcefulness during my back n forth communication via PM as well as his posted diagram/how to on 1199ducati.net forums. That said, on to my story!
I purchased my LED headlight off ebay a few months ago and it had been sitting for a while. Why? To be honest, I was scared of taking off parts myself after hearing how difficult this bike is to work on compared to most japanese bikes. Man, talk about truth right there! This was a pain in the ass for me and a buddy of mine who helped me with the swap. Most of the stuff was straightforward and easy. The stupid rubber piece for the mirrors and the wires that clip in for the blinkers was frustrating to deal with. That was really the most difficult part for me.
Anyways, I pulled up this diagram on my buddies Ipad which EvoL had posted while we worked on the bike.

The rest was following the step by step instructions of where the base headlights wires connect to on the LED headlight harness. We pulled out the 3 wires from the relay (yellow/gray, yellow/white, white) and left the remaining wires with the relay.
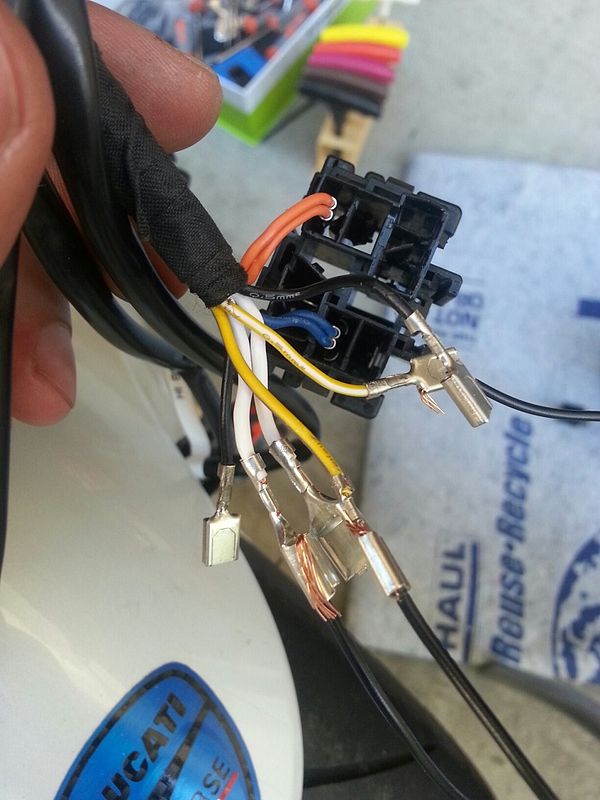
The other 2 wires (black, yellow) came from the center connection. We had messed up the first time because we weren't paying attention and pulled out the black wires from the previous photo with the relays, which is why it is sticking out but we put it back in its place once we figured out the right wire to use which is circled in red in the picture below.
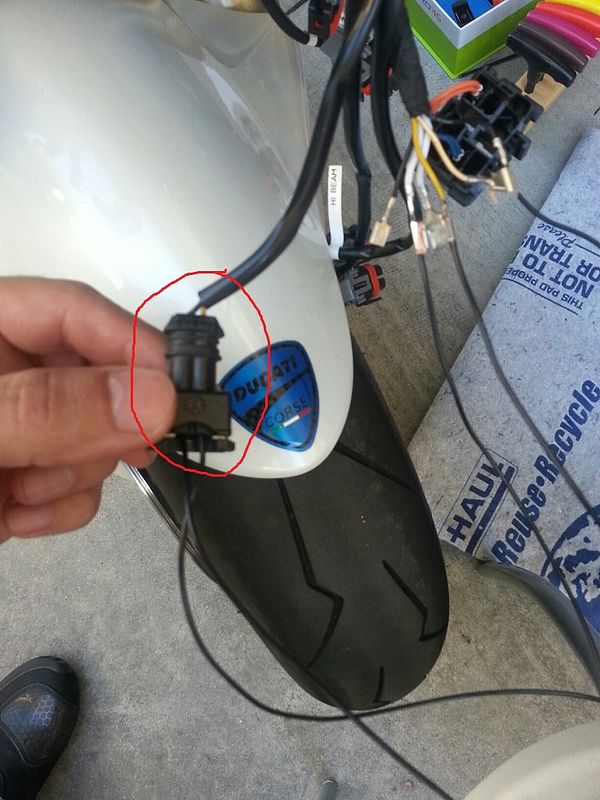
The next step we took was to add some wire to extend the factory wires since it is very short. This made it easier to test things out as well. I simply stripped the ends of the newly added wires, then inserted into the slots of the factory harness just to do a test run and make sure that I had the right wires going to the right ones before making the finalized connections.
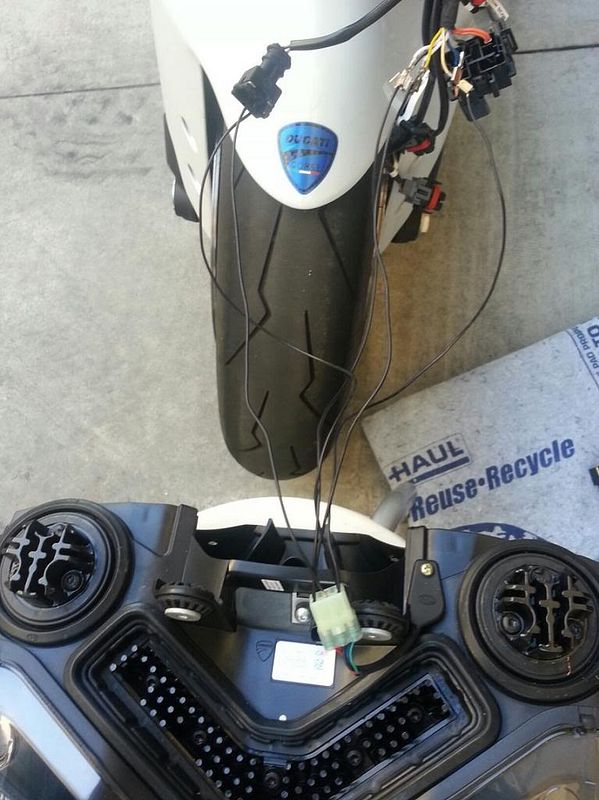
After testing all the lights (DRL, high beam, low beam) I had to make a decision on how I wanted to make the permanent connections. After thinking thoroughly about it and coming to the conclusion that I don't ever intend on selling these LED headlights, I decided to cut off the factory connectors and solder the ends together and then wrap it up with electrical tape. We soldered each connection and then taped them individually and then taped up the 5 wires together to try and minimize the exposed wires for an easier job of tucking everything back in behind the nose fairing.

Important thing to remember. Make sure you remove the piece right in the middle of the base headlight and transfer it on to the LED headlight. You can see it to the left of the electrical tape in the photo above. I'm not sure exactly what it's called but I think it's the air sensor?? It's held in place by one screw and without that piece, the dash will throw a check engine light. This is why you want to test everything before putting pieces back together.
In the picture below, you can see the 3 wires pulled from the relays and the rest were left in the relays.
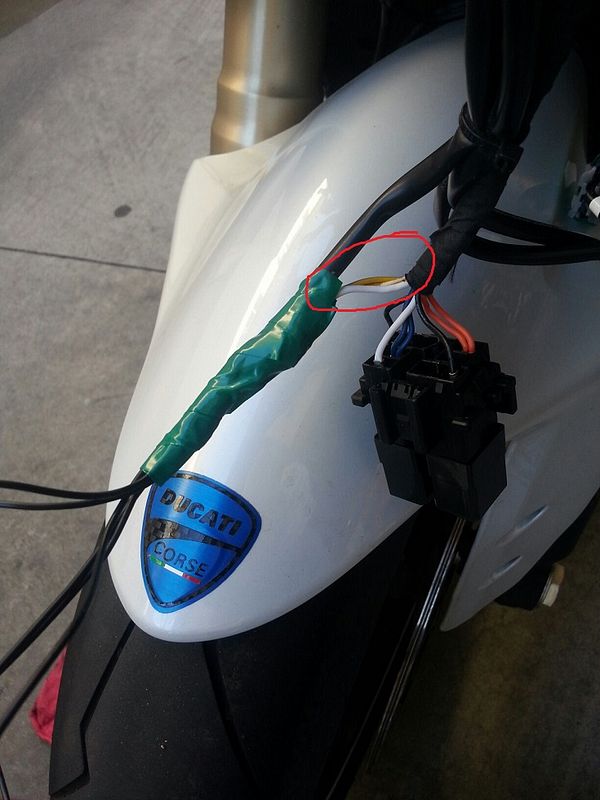
After that was done, the next step was taping up the base wires for the high/low beams to prevent water from getting into them.
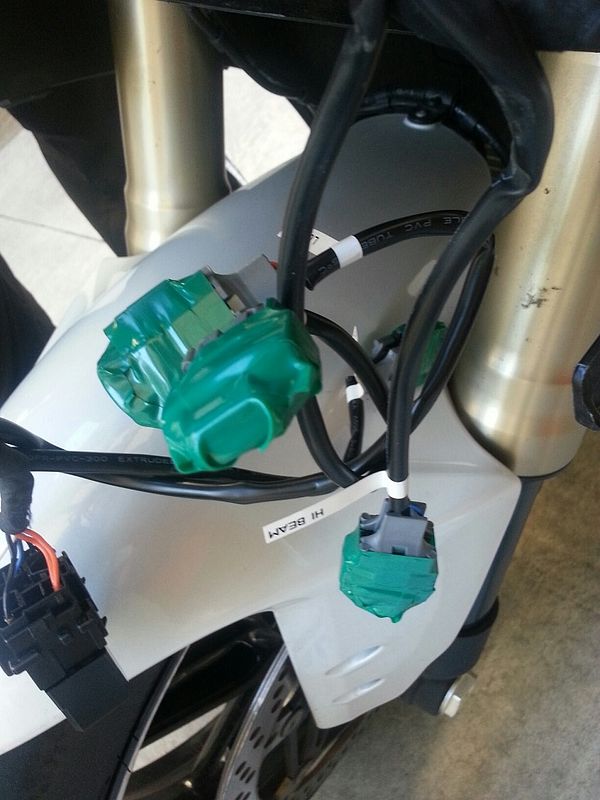
Only thing left after all that was to find a place to tuck all the wires into behind the nose fairing. I ended up tucking all of it right above the actual headlight. It's a tight fit but you can make it fit. Then it was simply just putting the fairings back on and making sure everything was tight and good to go. The end result is pure awesomeness. I intentionally waited til it was dark outside to ride back home so I can test them out and DAMN they are bright!
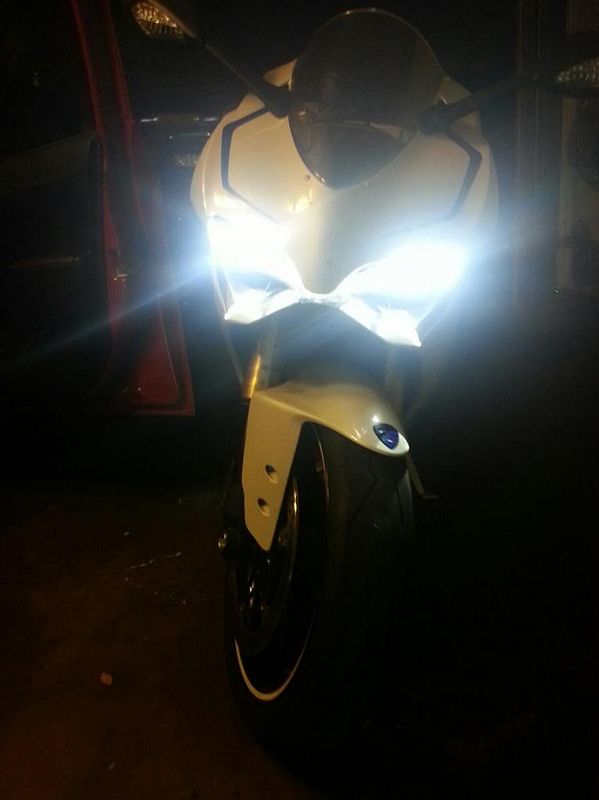
Hopefully this makes it a little easier to understand exactly what needs to be done. It's a great mod. There would be zero benefit (for me anyway) to go back to the base headlights and sell the LED headlights which is why I cut the factory connections and decided to solder. If I sell the bike down the road, this will go right along with it. Anyways, enjoy!
I purchased my LED headlight off ebay a few months ago and it had been sitting for a while. Why? To be honest, I was scared of taking off parts myself after hearing how difficult this bike is to work on compared to most japanese bikes. Man, talk about truth right there! This was a pain in the ass for me and a buddy of mine who helped me with the swap. Most of the stuff was straightforward and easy. The stupid rubber piece for the mirrors and the wires that clip in for the blinkers was frustrating to deal with. That was really the most difficult part for me.
Anyways, I pulled up this diagram on my buddies Ipad which EvoL had posted while we worked on the bike.

The rest was following the step by step instructions of where the base headlights wires connect to on the LED headlight harness. We pulled out the 3 wires from the relay (yellow/gray, yellow/white, white) and left the remaining wires with the relay.

The other 2 wires (black, yellow) came from the center connection. We had messed up the first time because we weren't paying attention and pulled out the black wires from the previous photo with the relays, which is why it is sticking out but we put it back in its place once we figured out the right wire to use which is circled in red in the picture below.

The next step we took was to add some wire to extend the factory wires since it is very short. This made it easier to test things out as well. I simply stripped the ends of the newly added wires, then inserted into the slots of the factory harness just to do a test run and make sure that I had the right wires going to the right ones before making the finalized connections.

After testing all the lights (DRL, high beam, low beam) I had to make a decision on how I wanted to make the permanent connections. After thinking thoroughly about it and coming to the conclusion that I don't ever intend on selling these LED headlights, I decided to cut off the factory connectors and solder the ends together and then wrap it up with electrical tape. We soldered each connection and then taped them individually and then taped up the 5 wires together to try and minimize the exposed wires for an easier job of tucking everything back in behind the nose fairing.

Important thing to remember. Make sure you remove the piece right in the middle of the base headlight and transfer it on to the LED headlight. You can see it to the left of the electrical tape in the photo above. I'm not sure exactly what it's called but I think it's the air sensor?? It's held in place by one screw and without that piece, the dash will throw a check engine light. This is why you want to test everything before putting pieces back together.
In the picture below, you can see the 3 wires pulled from the relays and the rest were left in the relays.

After that was done, the next step was taping up the base wires for the high/low beams to prevent water from getting into them.

Only thing left after all that was to find a place to tuck all the wires into behind the nose fairing. I ended up tucking all of it right above the actual headlight. It's a tight fit but you can make it fit. Then it was simply just putting the fairings back on and making sure everything was tight and good to go. The end result is pure awesomeness. I intentionally waited til it was dark outside to ride back home so I can test them out and DAMN they are bright!

Hopefully this makes it a little easier to understand exactly what needs to be done. It's a great mod. There would be zero benefit (for me anyway) to go back to the base headlights and sell the LED headlights which is why I cut the factory connections and decided to solder. If I sell the bike down the road, this will go right along with it. Anyways, enjoy!
Last edited:

