- Joined
- Nov 18, 2011
- Messages
- 2,084
- Location
- Round the World on an 1199
Here's a quick how-to-change brake pads on the Panigale.
Tools needed:
8mm Hex wrench
8mm Hex socket and Torque wrench
Locktite Red
Parts needed:
1098S* brake pads
Note: Ducati charges the cock-in-the-butt price of $177 for a pair of 1199 brake pads. No way I was paying $350+ for a full set! Fortunately 1199 pads are identical to the ones for the 1098S, saving $270.
I got 9500 miles out of the stock pads. Could have squeezed another 1000 out, but I don't want to be stuck in the middle of nowhere with no garage, no tools and nothing but backing plates to slow me down. So I headed over to RSRs garage and we swapped the stock ones out with EBCs.
'Normal' calipers allow removal of the pads from the top, but the forged Brembos on the 1199 have a solid bridge running across the top of the pads, necessitating removal of the caliper.
Step 1:
Remove the two bolts shown using an 8mm Hex wrench.
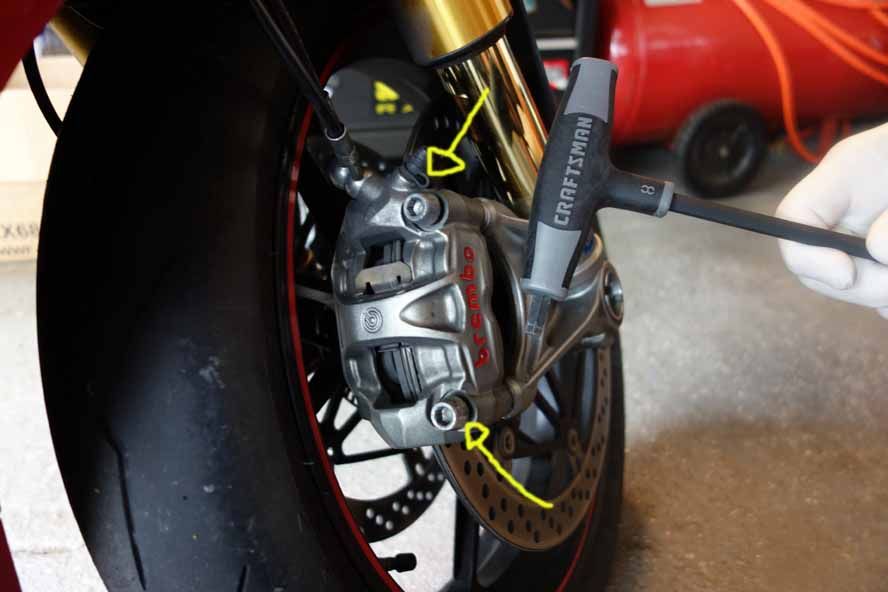
Step 2:
Catch the washer-spacers as you pull the bolts out and set aside.
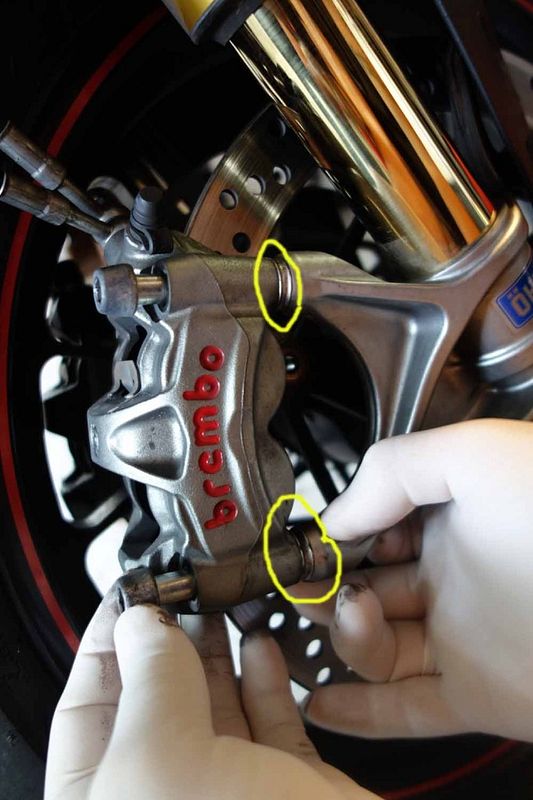
Step 3:
Wiggling the caliper slightly will push the pistons back, giving you enough space to angle it off of the rotor. Once out, angle the caliper to access the pads, while being careful not to crank on the brake lines (note: this pic was taken from the ground up. Don't try flipping the entire caliper upside down or you'll crimp the brake lines, which could result in brake failure):
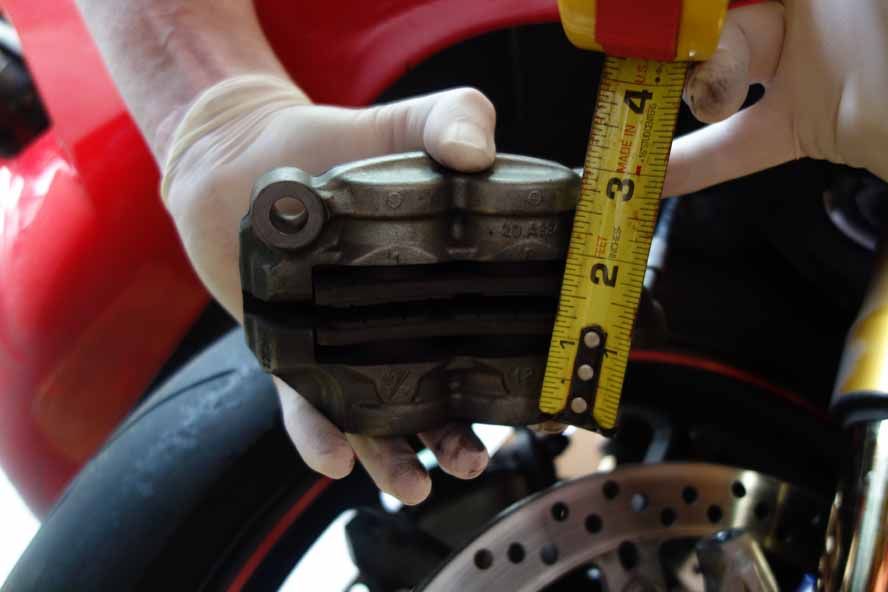
Step 4:
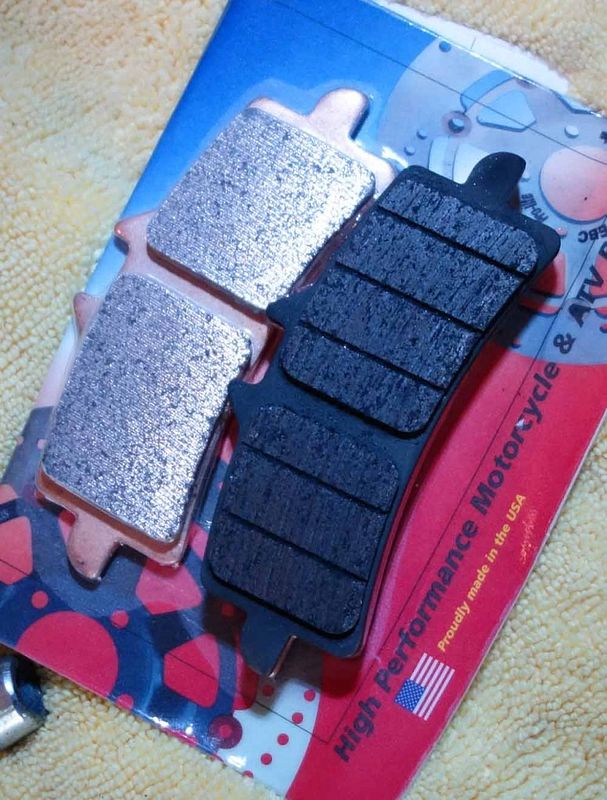
Push down on one pad (doesn't matter which) and wiggle it out. If you notice on the pic below the pads have little 'winglets' that fit into slots forged into the inside of the caliper. To get them in and out you need to apply pressure to the pad, which pushes the 'headles man" clip (that you can see in the center of the caliper in the first photo) back and allows you to angle the pad out.
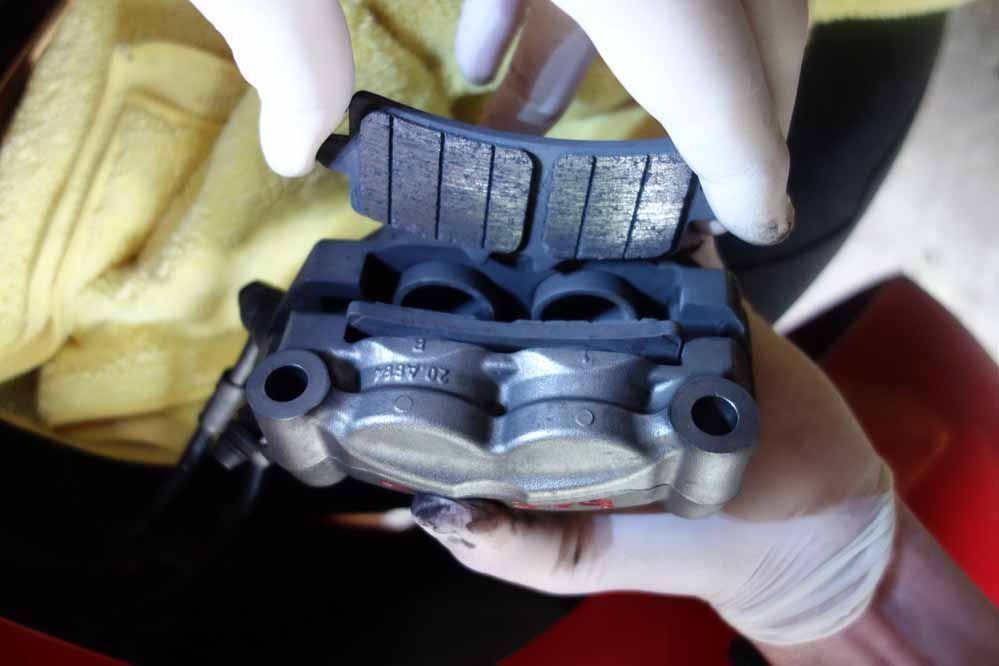
Important: Don't remove both pads at this point. Keeping one pad in keeps pressure on the little clip, making installation easier.
Step 5:
Clean the two exposed pistons, then push them back with your fingers, making sure you apply pressure on both at the same time (if you apply pressure on just one you could pop the one you're not holding out). If the pistons are hard to push back, crack the top of the reservoir, which will ease resistance.
Step 6:
Installl new pad by pushing into caliper (down/back) and angling it around so it slots in place. (By keeping a second pad in you also will be able to visually check that it's in the proper place by comparing it with the stock pad.)
(Notice winglets and the differences/similarities between the two pads)
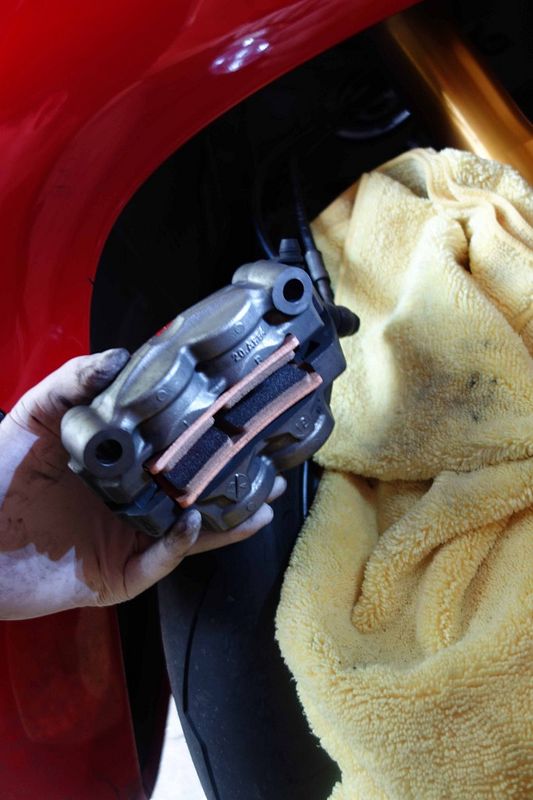
Step 7:
Repeat process for other pad and it should look like this:
Step 8:
Reinstall caliper (don't forget the washers) and torque bolts down to proper spec. (We used Loctite Red, too.)
Step 9:
Repeat process for other side, then grab the brake and pump it until lever is firm.
Should take about 15 minutes. Might be a good time to consider changing or bleeding your brakes, too (I did it around 7000 miles already.)
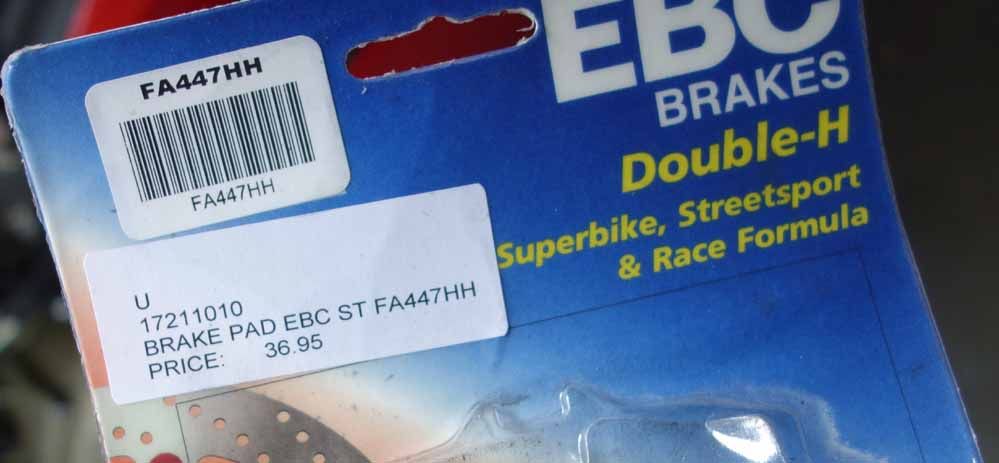
Part number for 1098S EBC pads:
Tools needed:
8mm Hex wrench
8mm Hex socket and Torque wrench
Locktite Red
Parts needed:
1098S* brake pads
Note: Ducati charges the cock-in-the-butt price of $177 for a pair of 1199 brake pads. No way I was paying $350+ for a full set! Fortunately 1199 pads are identical to the ones for the 1098S, saving $270.
I got 9500 miles out of the stock pads. Could have squeezed another 1000 out, but I don't want to be stuck in the middle of nowhere with no garage, no tools and nothing but backing plates to slow me down. So I headed over to RSRs garage and we swapped the stock ones out with EBCs.
'Normal' calipers allow removal of the pads from the top, but the forged Brembos on the 1199 have a solid bridge running across the top of the pads, necessitating removal of the caliper.
Step 1:
Remove the two bolts shown using an 8mm Hex wrench.

Step 2:
Catch the washer-spacers as you pull the bolts out and set aside.

Step 3:
Wiggling the caliper slightly will push the pistons back, giving you enough space to angle it off of the rotor. Once out, angle the caliper to access the pads, while being careful not to crank on the brake lines (note: this pic was taken from the ground up. Don't try flipping the entire caliper upside down or you'll crimp the brake lines, which could result in brake failure):

Step 4:
Push down on one pad (doesn't matter which) and wiggle it out. If you notice on the pic below the pads have little 'winglets' that fit into slots forged into the inside of the caliper. To get them in and out you need to apply pressure to the pad, which pushes the 'headles man" clip (that you can see in the center of the caliper in the first photo) back and allows you to angle the pad out.

Important: Don't remove both pads at this point. Keeping one pad in keeps pressure on the little clip, making installation easier.
Step 5:
Clean the two exposed pistons, then push them back with your fingers, making sure you apply pressure on both at the same time (if you apply pressure on just one you could pop the one you're not holding out). If the pistons are hard to push back, crack the top of the reservoir, which will ease resistance.
Step 6:
Installl new pad by pushing into caliper (down/back) and angling it around so it slots in place. (By keeping a second pad in you also will be able to visually check that it's in the proper place by comparing it with the stock pad.)
(Notice winglets and the differences/similarities between the two pads)

Step 7:
Repeat process for other pad and it should look like this:

Step 8:
Reinstall caliper (don't forget the washers) and torque bolts down to proper spec. (We used Loctite Red, too.)
Step 9:
Repeat process for other side, then grab the brake and pump it until lever is firm.
Should take about 15 minutes. Might be a good time to consider changing or bleeding your brakes, too (I did it around 7000 miles already.)
Part number for 1098S EBC pads:

