2020 Panigale V2 - Race Build Thread

Ducati Forum

Help Support Ducati Forum:

If it helps you here is what I have on my race bike so far


Motomillion - Received
Panigale Spacers Ducati Throttle Spacer Kit - R
WRS Double Bubble Tall Racing Windscreen - R
TWM Brake Lever Guard - R
Domino MotoGP Dual Compound grips (Red/White) - R
Ducabike CNC Throttle Housing Right Hand Switch Panel - R
Dieci83 Aluminum Radiator Guard Set -R
SP connect phone mount
BST Carbon Fibre wheels


Ducabike - DHL 7483614213 (Aug 2nd), 1032570781 (Aug 4th)
Ducabike push button panel CV02D - R
Ducabike steering damper support SAS02D -R
CPPI13 - 7 BUTTONS HANDLEBAR STREET SWITCHED - R
BSRA53D - ADJUSTABLE HANDLEBAR GP d. 53 MM. OFF SET 15 mm.- R
RPLC09 - SHIFT LEVER PANIGALE - R
PSS09D - V2 UPPER STEERING PLATE GP EDITION - R

Cordona -R
Cordona QS/blip 420 EVO-SpecialeV2

STG
GB Racing Cover - Stator

Brembo 19mm RCS Corsa Corta Radial Brake Master Cylinder
Brembo Brake Reservoir Mounting Kit for RCS
Woodcraft rearsets

Pitbull
Pitbull single side rear stand - removable handle with both pins
Pitbull Front stand pin
Pitbull TRS pin fitting only

Joe WitchKraft
Ohlins Rear Shock - DU569
Ohlins SD068 steering damper
Ohlins Front suspension

Strauss
Strauss Carbon Tank Sliders

WSBK
DB holder race fairing stay with air ducts

Aaron
7 pc Samco Sport Silicone Radiator Coolant Hose Kit / Clamps
Oversuspension
Aella frame slider kit

cruciata track fairings
 
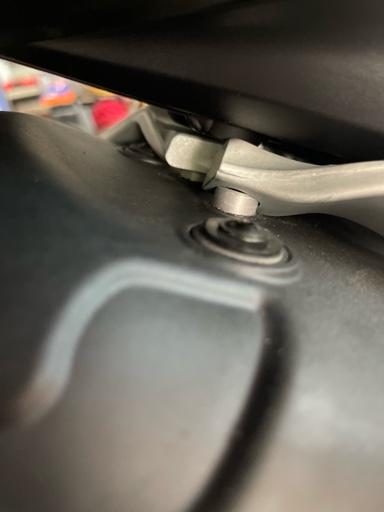
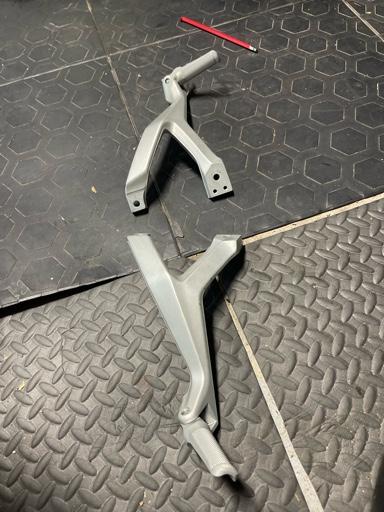
I was able to take them off but it was a struggle due to the built in spacers (or whatever you want to call these cones) - I was expecting the pegs to slide off but they did not and had to play some advance level Tetris to get them out

Part number for spacer is 71614961AA
77f77ab62a78c028078c54448f7e1d2b.jpg

b8f3bdacbaee024d5c4b6f339d63fc0d.jpg


Sent from my iPhone using Tapatalk
I had the same issue, removed the four bolts without having to take anything off the bike. The heat shield bolt hole have a small lip, so you need to put some careful leverage on the heat shield and simultaneously wiggle the peg upwards to clear the lip. 60% of the time, it works every time.
 
Don't put Vandemon on this bike. Akra is expensive but worth it, under belly exhaust is going to be fine when you go down

Yeah, not putting the Vandemon on. I'll go with Termi force or Spark most likely. I'm expecting the high exit pipes will give me more options for a race compliant belly pan.

60793fffec6df.jpg
D10-STILL-1-SITO.jpg
 
yes also won't have to remove them every time you d can oil change
the Akra high pipes are also good...

I can't find a high mount Akra kit for the V2 that's available to the public - that's my first choice. If someone has a link, that would be great.
 
How do the Cruciata track fairings fit and how is their quality? Did you have to do a lot of prep to paint them? Pics?

They are the closest fairings available today which fit the V2

Note - if I put CRC and cruciata fairings in front of most people, they won’t be able to tell the difference - it seems like they are awfully similar

I did not have to make any major modifications to fit them, most of the holes aligned out of the box

I would say the fit is good but not great

From a quality perspective, they seem inferior than armor bodies but armor bodies fairings for V2 do not fit the V2 at all - woodcraft is selling 15-17 1299 fairings as V2 fairings, it’s an absolute shame

Cruciata fairings are not primed so you will have to prime them yourself for painting but once primed they hold the paint fairly well

I have not yet crashed in them so I don’t know how durable they are but they definitely look less rigid than a typical armor bodies fairings but way more nicer than hotbodies - if you know what I mean

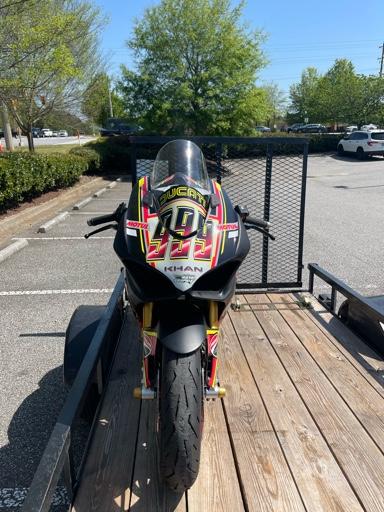
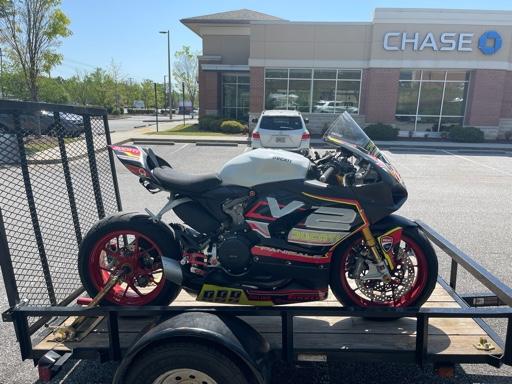
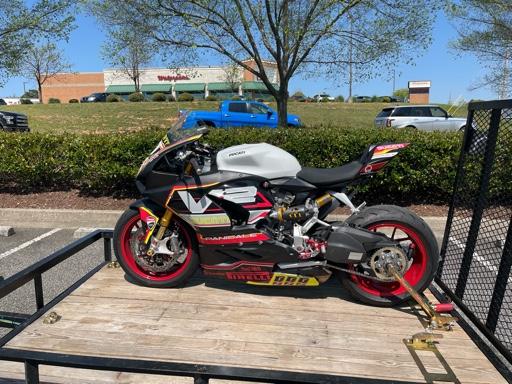
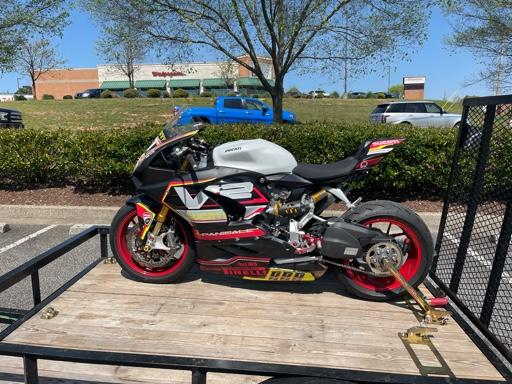
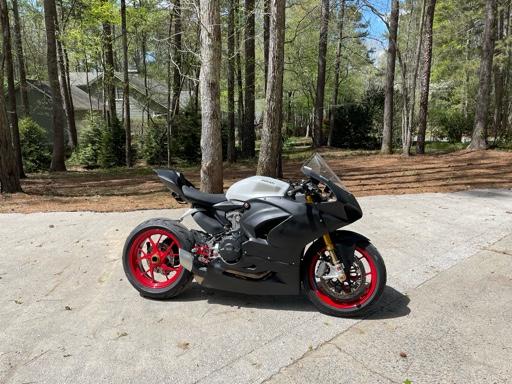
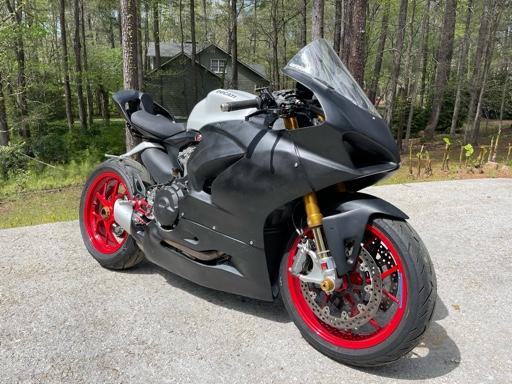
Some pics attached - initially I had them painted just gray, than I went for black and put some decals on
e432b377b744955b77cd075f5eb0f2b7.jpg

2e91188548ed64a71697211997ac60ce.jpg

0a881f0553b18d7b6f652ca21baf4d6b.jpg

63ada2041427479b2168514a73dad6e0.jpg

1994449f71f7208d46283523fb5a6818.jpg

42c3784896d8e0618a1ed9820ae1ca74.jpg

08d9505c7142274039131aaba09e995c.jpg

63e1aa35687ac4dc8c51292edee0a84e.jpg

bada678c9c7fda7db3d463257d35bbfd.jpg


Sent from my iPhone using Tapatalk
 
Last edited:
They are the closest fairings available today which fit the V2

Note - if I put CRC and cruciata fairings in front of most people, they won’t be able to tell the difference - it seems like they are awfully similar

I did not have to make any major modifications to fit them, most of the holes aligned out of the box

I would say the fit is good but not great

From a quality perspective, they seem inferior than armor bodies but armor bodies fairings for V2 do not fit the V2 at all - woodcraft is selling 15-17 1299 fairings as V2 fairings, it’s an absolute shame

Cruciata fairings are not primed so you will have to prime them yourself for painting but once primed they hold the paint fairly well

I have not yet crashed in them so I don’t know how durable they are but they definitely look less rigid than a typical armor bodies fairings but way more nicer than hotbodies - if you know what I mean

Some pics attached - initially I had them painted just gray, than I went for black and put some decals on
e432b377b744955b77cd075f5eb0f2b7.jpg

2e91188548ed64a71697211997ac60ce.jpg

0a881f0553b18d7b6f652ca21baf4d6b.jpg

63ada2041427479b2168514a73dad6e0.jpg

1994449f71f7208d46283523fb5a6818.jpg

42c3784896d8e0618a1ed9820ae1ca74.jpg

08d9505c7142274039131aaba09e995c.jpg

63e1aa35687ac4dc8c51292edee0a84e.jpg

bada678c9c7fda7db3d463257d35bbfd.jpg


Sent from my iPhone using Tapatalk

From the photos it looks like you're running the OEM exhaust. So I presume the belly pan is open at the back, so not for catching fluid? I checked their website and there weren't many images to go by.
 
From the photos it looks like you're running the OEM exhaust. So I presume the belly pan is open at the back, so not for catching fluid? I checked their website and there weren't many images to go by.

Yes indeed I am running the OEM exhaust

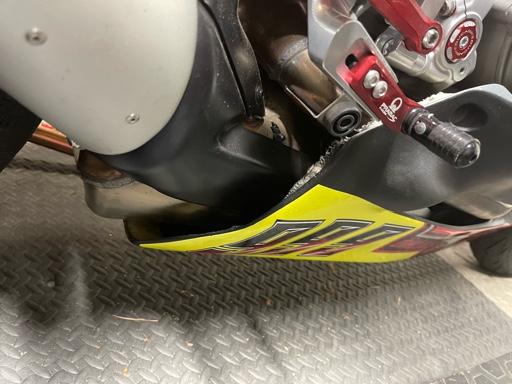
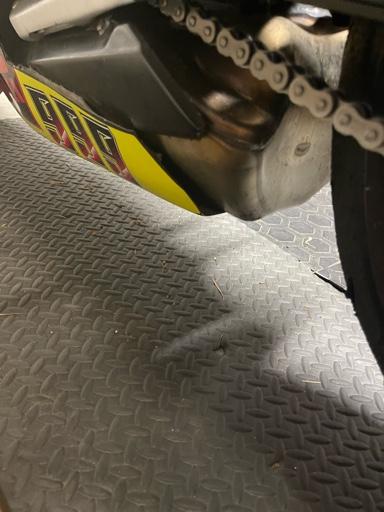
The belly pan actually is snug with the stock exhaust - it hugs the exhaust really tightly

The hope is that if something leaks, it happens in the front or mid section so the belly pan can catch it and not at the back end
7370b63dda2e7525de7c42a3ff244e9a.jpg


See attached pictures
98c3f370e642074a246976e5c0615484.jpg


Sent from my iPhone using Tapatalk
 
Yes indeed I am running the OEM exhaust

The belly pan actually is snug with the stock exhaust - it hugs the exhaust really tightly

The hope is that if something leaks, it happens in the front or mid section so the belly pan can catch it and not at the back end

Cool, so that wouldn't be race legal with it open at the back. Looks like Plastic Bike is still the go-to option for me.
PBV2LEFT.jpg
 
On the topic of exhausts, I was wondering if anyone has/does run a Spark system on their V2/959/1299, etc.? My plan has been the Termi Force, but for comparable money Spark makes a high set, twin exit system in Ti. What's the quality like?

Spark GDU8832
Have a look at van demon the do a high set, and no where near the cost of akra, theyre located in NSW and delivery is quick as 10 quick things
 
Have a look at van demon the do a high set, and no where near the cost of akra, theyre located in NSW and delivery is quick as 10 quick things
Do note that VanDemon is a Chinese made system not Australian. That being said I am trying one out on a project. Also note that I have had Akra, Storm, Termi and SC Project pipes and for the money, the VD pipe is pretty damn good. The wall thickness is better than the Akra and Termi pipes. The welds fully penetrate and are a work of art. The uniformity of the bends, joints and terminations are IMO much nicer than the other pipes mentioned. Aesthetically, the headers are top notch. The cans are decent. The carbon and brackets are poop. Performance figures? Don’t know but unless your competing for a SBK title, it’s negligible. Still ....... Chinese though so if you’re a purist, spend more money.
6E026D48-3974-4424-896A-7B3CCC28B2CD.jpeg
D361C817-8D55-459A-9E1A-8A328BF5E96F.jpeg
 
Been a few weeks since I posted, though not a lot has happened as I'm pretty busy at the moment. I've ordered a few bits and am looking for the best place to start, which seems to be at the motor/frame and then build outwards from there. Suspension gets installed next week and the exhaust arrives pretty soon, in the next two week I think. I also ordered in the Evap Delete and AIS Delete kits from Smart Moto in the UK and a silicone hose kit from Eazi-Grip to get started with.

IMG_1150 Large.jpeg


When I initially ran the bike it was leaking a bit of coolant under load, so I need to check the hoses and clamps. I reasoned, if I have to strip the bike to check and replace the clamps, then I may as well replace the hoses. So the idea is to strip the bike and do the Evap, AIS and hoses as one job. I'd like to trace the AIS and Evap hoses to their sources and plug in/close to the airbox/throttle bodies if I can. To do this, and the hoses, I need to remove the throttle bodies and the airbox base, along with all the plastics along each side of the bike to access the space in the V.

Taking a look at the parts diagrams I'm getting a bit stuck - it doesn't look like the airbox base comes out without splitting the frame, or am I missing something? These are the bits I'm trying to remove, along with replacing all the hoses.

Evap System
Evap system.png


AIS System
AIS System.png


Cooling Hoses
cooling hoses.png


So how do I access the V of the motor to pull all the hoses and thermostat out, remove the AIS and trace the Evap vacuum hose? Ideas on a postcard please.
 
Last edited:
Maybe you can get to some stuff from the left side of the bike, but to really get at it the frame has to be removed from the engine.

Most of the coolant hoses seem accessible from the left hand side, though the thermostat housing looks damn tight to get to. I'll look for some "how to" guides on changing the coolant hoses and that may give me ideas for tracing the AIS too.
 
I pulled the AIS (secondary air injection system) off tonight and installed the SmartMoto kit, was easier than expected once I pulled the wiring loom off. Some of the SmartMoto instructions are a bit crap, this particular one didn't have any diagrams, only linked to a user video which I'd seen before. The video spent its time showing how to install the blanking plates but didn't go into any detail on removing the AIS controller that plugs into the bottom of the airbox. In the end it wasn't hard, so no drama.

Here's a summary, which I expect applies to most, if not all, the Panigale twins.

The kit (package on the left) contains the two blanking plates, bolts, airbox plug and connector for the wiring harness.
IMG_1150 Large.jpeg


The AIS is mainly on the right hand side of the motor, with a single hose running to the left of the rear cylinder, by the shock. To gain access you need to remove the wiring harness mount on the right, and loosen the ABS unit. I'm sure you can try and shortcut it a bit but I'm doing the EVAP system and coolant hoses, so am happy to strip it down and make it easy to work on.
IMG_1249 Large.jpeg


The hardest part was removing the AIS control unit, it plugs into the base of the airbox and has two hex screws - one you can see, and one you can't. It took about 20 minutes of fidling to crack the loctite on the second screw, but that was the worst of it. Once the screws are out, you gently slide the controller out. Remember to take the hose off the rear cylinder first to make it easy to slide out, and once you're done, fit the supplied connector to the wiring harness (blue plug).
AIS controller.jpeg

AIS unit.jpeg


Next, take a look under the airbox, where you pulled the controller out. There will be a hole through into the airbox. Take the plastic plug supplied in the kit and press it firmly into the hole. I pressed it in from the bottom, thinking I wouldn't want any airbox vacuum to suck it out if I installed it on the inside. It makes sense to me, no idea if that's right.
Airbox Hole.jpeg

Airbox Plug.jpeg


Then the easy part, remove the two AIS plates from the heads and install the blanking plates. The kit comes with screws and washers, they worked just fine for me. Remember to use red loctite and not too much torque. For small bolts like these I chose 7Nm, they're not doing anything exciting after all (I was too lazy to read through the photographed list of torque settings). The front plate is behind the ABS unit and a bit of a pain, but you can work around the ABS unit if you've taken it off the motor.
FrontAIS.jpeg

RearAIS.jpeg


And you're done, should be left with this.
AIS.jpeg
 
Smart people, I need some advice on the vacuum return hoses from the evap canister to the intakes. The kit I have just want to the plug the hose that runs to the evap, leaving the T-piece and individual hoses that run to each intake. I'm more inclined to take all the vacuum hoses out and seal it at the motor (less hoses and fewer things to go wrong).

The cleanest outcome will be to replace the nipples in the intake with short bolts. Besides getting the length right and not over-tightening, any issues with replacing these nipples with bolts? The hole it came from is to the left and above the nipple.
evap screw.jpeg
 

Register CTA

Register on Ducati Forum! This sidebar will go away, and you will see fewer ads.

Recent Discussions

Back
Top