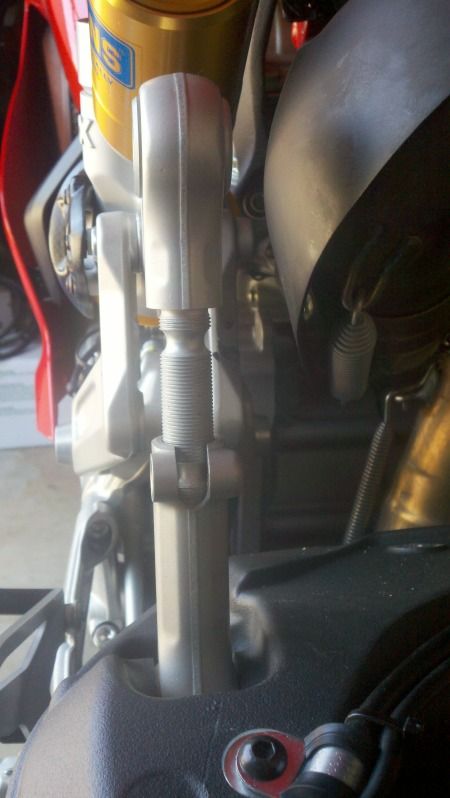
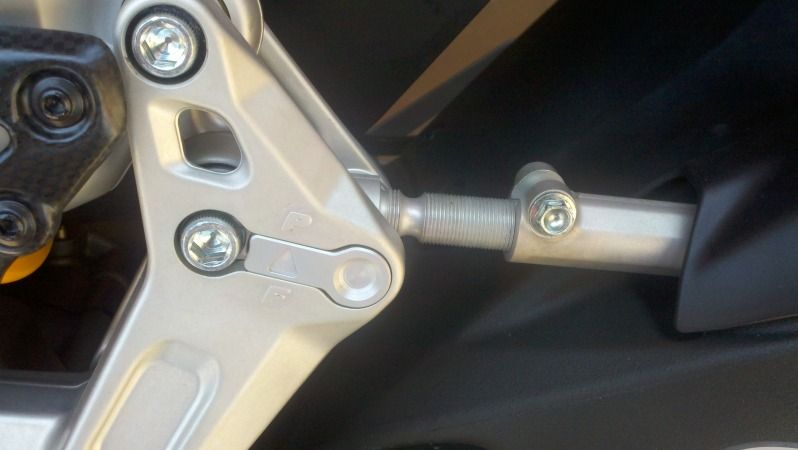
Ok so I switched my rear shock linkage from "F"(flat) to "P"(progressive) today and shot a few photo's. The rear suspension is still stiff but way better. I can actually feel the rear suspension moving now. My afternoon ride was much more enjoyable and the rear doesn't bounce sideways in bumpy turns.
Tools used:
8mm Socket
13mm Wrench
4mm Allen key
8mm Allen Socket
(2) 16" Pry Bars from harbor freight or 7/16" Rods
(2) Jack Stands
Wheel Bearing Grease
OK first thing I did was remove the lower fairings on both side's. Its not really necessary but I did it anyways just because they get really really close to the lifting points where your inserting the pry-bars/rods to lift the bike. Refer to manual to remove lower fairings.
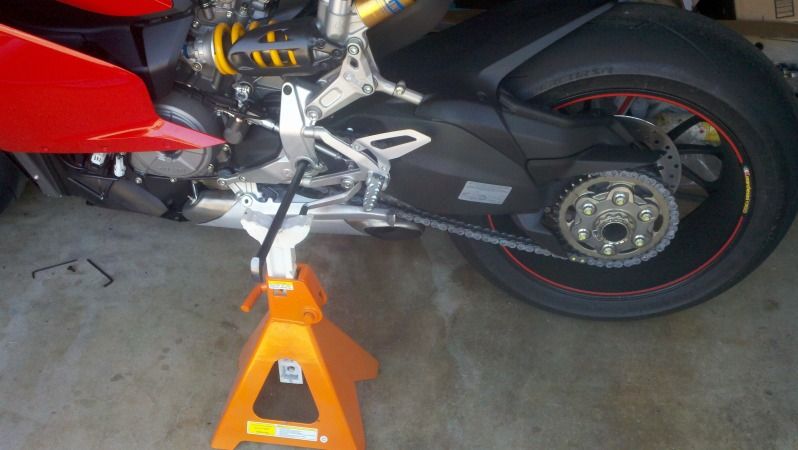
Next I placed one pry-bar inside the large hole right in front of the rearset(right side) and placed a jack-stand under it. The bike was not lifted at all at this point. I then straitened the bike, made it level and placed the other pry-bar on the other side of the bike(left) with a jack stand under it. This holds the bike level and upright. I then moved from side to side lifting the pry-bar while raising the jack-stand and letting it lock into position. This slowly lifted the tire in the rear off of the floor. If you have some other sort of stand that will lift the bike while letting the rear tire hang go ahead and use that instead.
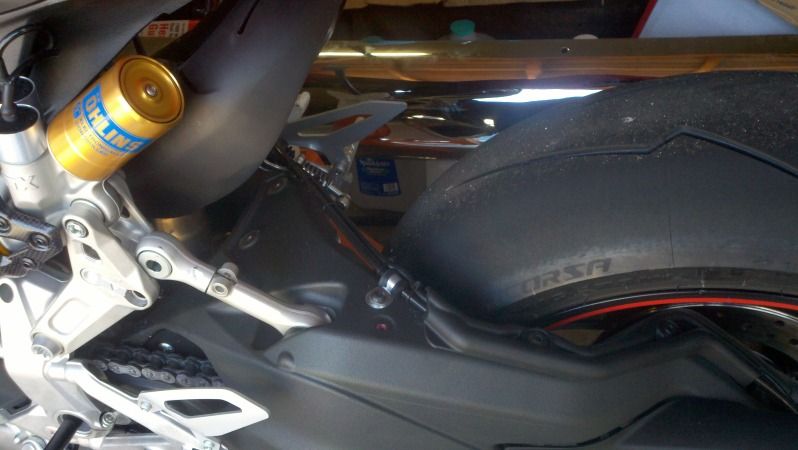
I recommend that you remove your rear fender using the 4mm allen key(I could not get my allen socket to fit under the exhaust). There are 4 bolts, 2 on top and 1 on each side. I didn't remove the rear fender at first and ended up doing it later to give me more room to rotate the linkage.
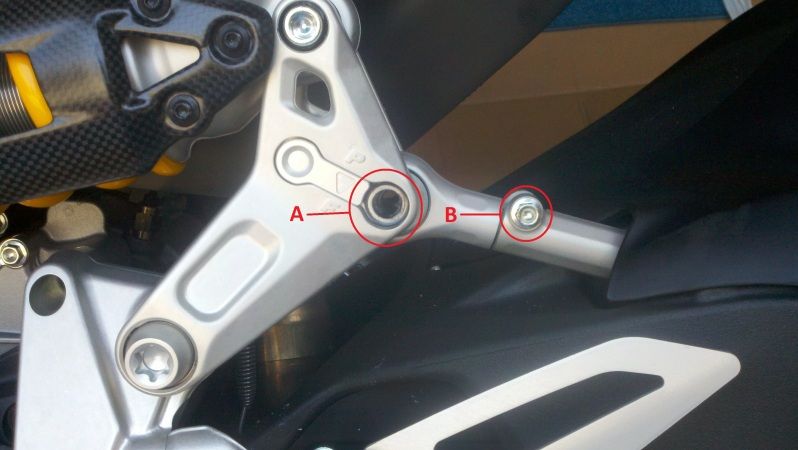
Remove Bolt A(swing arm push rod pivot bolt) using the 8mm socket and 13mm wrench for the nut on the back side. The rear tire will need to be supported as it will want to hang loose. And lift the push rod out of the linkage.
Now remove Bolt B(swing arm push rod retaining bolt) with an 8mm socket.
I put the push rod bolt inside the push rod to twist it loose so I wouldn't make marks with pliers.
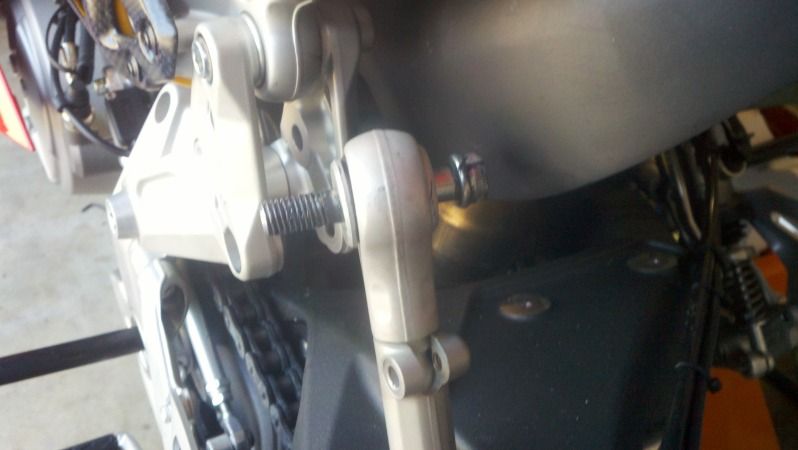
You will notice there is a slot where the push rod retaining bolt(B) was. You have to unthread (counter clockwise) the push rod a little over an inch to the second slot. This was very tight to unscrew. Now reinsert the retaining bolt and leave it loose. This will allow it to twist and line up later when putting it back together.
Next is to pop out the little bracket(indicator block) that has the arrow pointing down to "F" and flip it 180* so the arrow now points up to "P". It will now block the original hole that the push rod bolt was in.
You are now going to place the push rod ball joint into the linkage. It will now go into the hole on the linkage that is closer to the front. I had to lift he bike a little and move the rear tire up/down to get the ball joint and linkage holes to line up. It would definitely make it easier to have two people.
Reinsert the push rod bolt(A) with grease and tighten up the nut on the back side. IMPORTANT: you now must tighten up the retaining bolt(B).
When its done it should now look like this. Notice we are now using the front hole(was covered by the indicator block) and the push rod is threaded out further.
Lower bike one side at a time from the jack stands and reinstall rear fender and lower fairings.

